
Required Tools:
- Four-in-one screwdriver
- Rotary tool
- Two Adjustable wrench
- Hammer
- Slip joint pliers
- Locking pliers
Materials needed:
- Plumber's putty
STEP 1: REPLACE A LEAKING DRAIN STRAINER IN THE KITCHEN SINK
Inspect the sink drain for a leak.
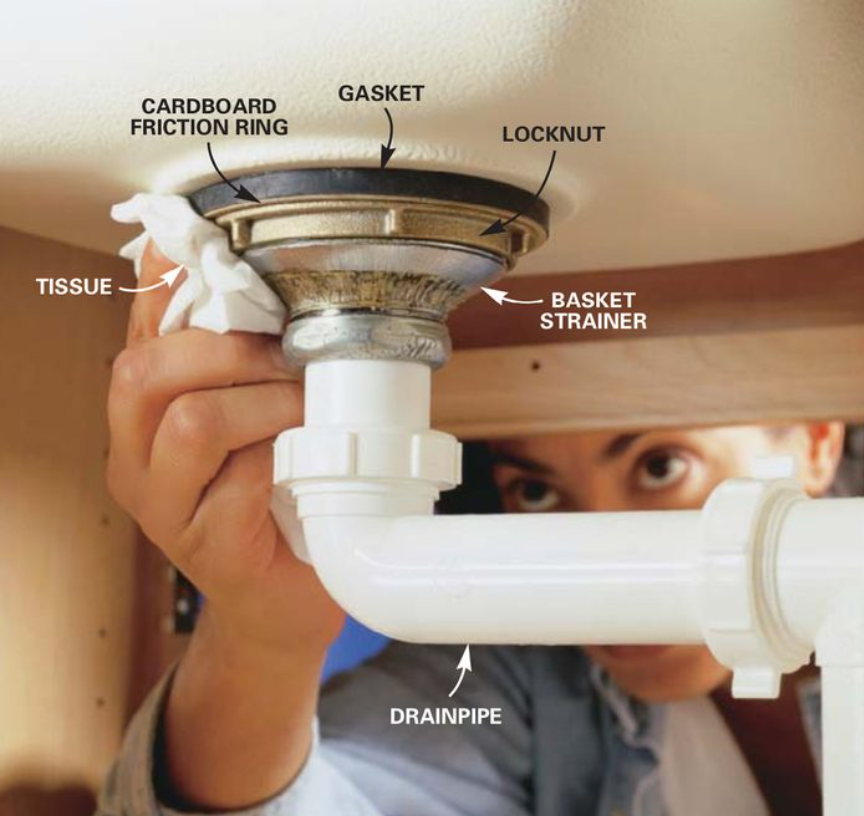
Place a facial tissue between the drainage and the sink and fill the sink halfway with water. If the tissue absorbs any water, you have a leaking basket strainer and need to know how to remove a drain.
STEP 2: UNDO THE COUPLING NUT
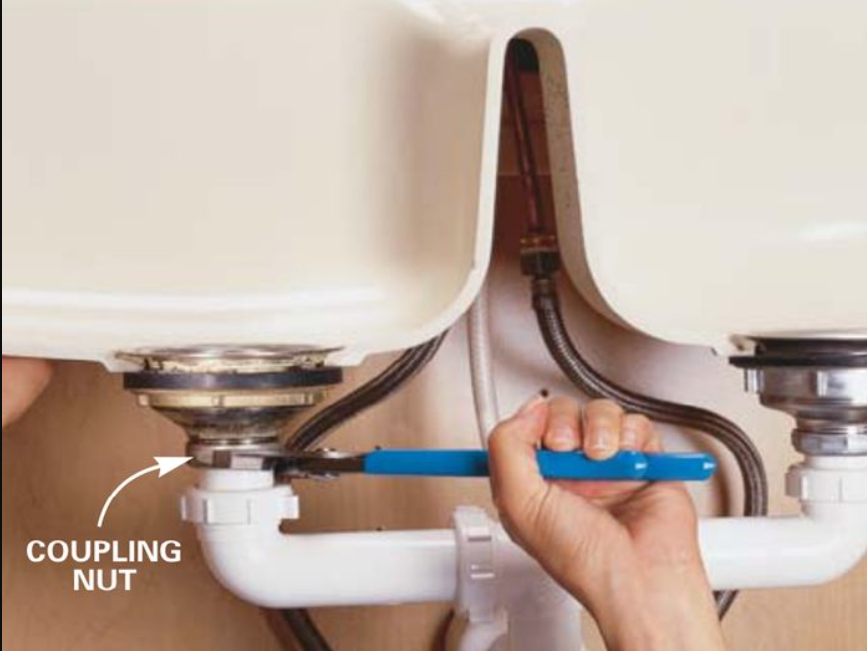
Undo the coupling nut at the base of the sink strainer basket using slip-joint pliers and slide the nut entirely off the threads.
STEP 3: UNSCREW THE LOCKNUT
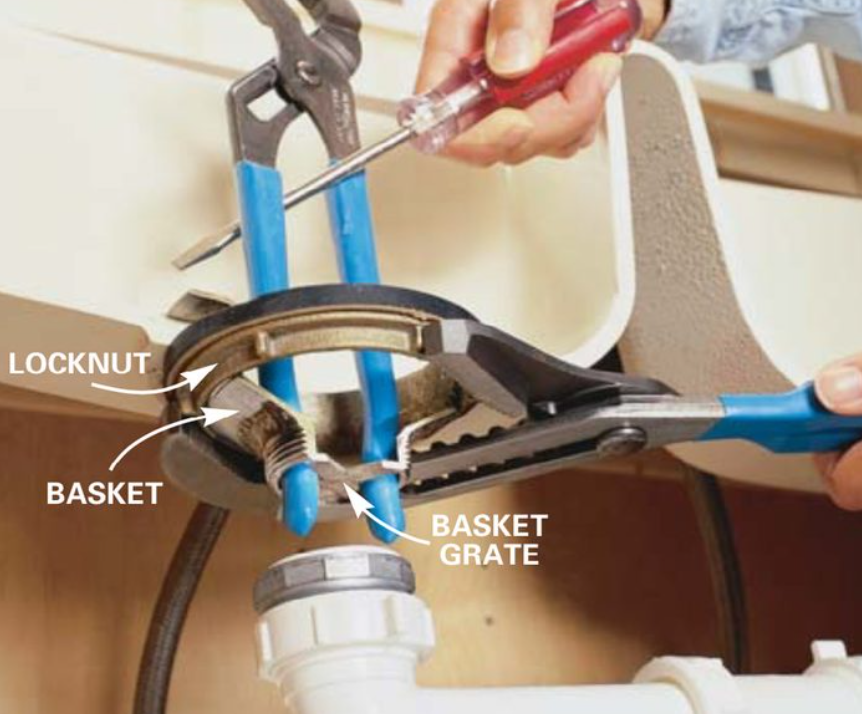
Unscrew the sink strainer locknut using 16-inch slip-joint pliers or a spud wrench. If the whole basket rotates, place a screwdriver between the pliers' handles and insert them into the strainer grate from above to keep it stationary. With the screwdriver, reach over the front of the sink or have someone hold it from above. If the drainpipe can be moved out of the way, you may push the plier handles up into the strainer grate from the bottom to get a firmer grip.
STEP 4: RESET THE BASKET WITH PUTTY
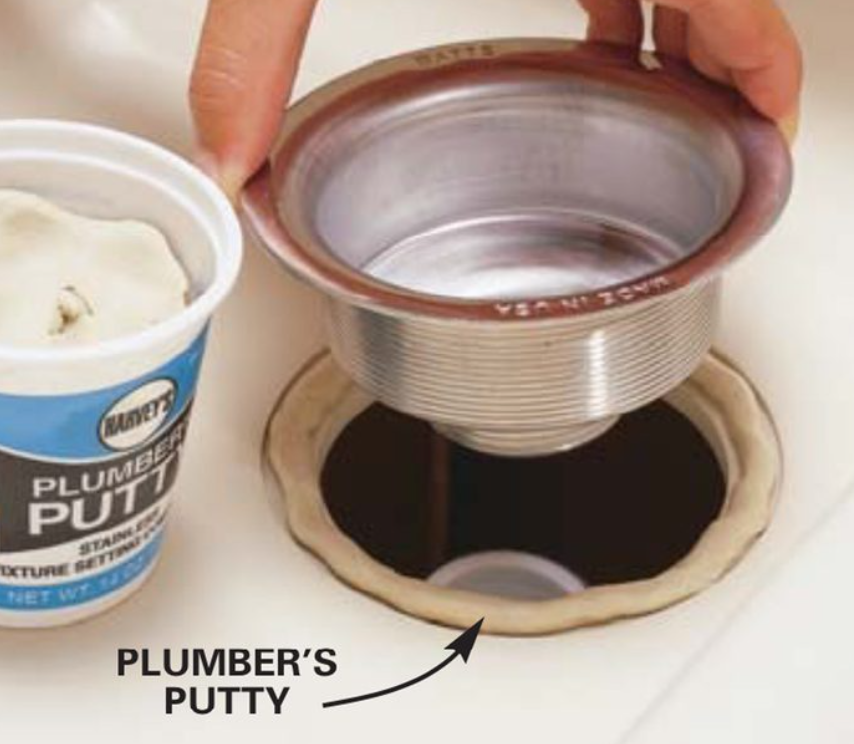
Roll the plumber's putty into a pencil-sized rope in your hands and wrap it over the lip of the sink drain opening. Retighten the locknut after pressing the strainer firmly into the putty, adding the rubber gasket, friction ring, and locknut beneath the sink.
A leaking basket strainer might be the source of a pool of water in the cabinet beneath your sink. Old plumbing fittings might be challenging to loosen, but we'll teach you how to disassemble them and reassemble them easily. All essential items may be found at a hardware shop or a home center.
Test the basket strainer for leaks to ensure the leak isn't originating from a pipe joint. Begin removing the basket strainer after you've confirmed it's leaking. The strainer locknut, which secures the basket to the sink, may be removed. Spray penetrating oil on the locknut if it has corroded in place. If you don't have enough pliers to obtain a good grip, tap the locknut with a hammer and an old chisel to loosen it. Remove the old basket from the sink by completely removing the locknut, friction ring, and gasket.
To avoid scratching the sink, scrape off the old putty with a disposable putty knife. Use plumber's putty to seal the replacement basket in the sink. Certain new sinks will be tagged to indicate that plumber's putty cannot be used. If you can't use a plumber's putty, use a silicone that isn't water-based. When you tighten the locknut in place, excess putty will flow between the new basket strainer and the sink. Using a cloth or paper towel, wipe it away. Ensure that the cardboard friction ring is inserted between the rubber gasket and the locknut, allowing the locknut to spin freely without snagging on the gasket.
STEP 5: BUYING TIPS
At least $50 will get you a high-quality basket strainer assembly with a long-lasting finish and a reliable stopper mechanism. A spin-lock or twist-and-drop type stopper is found on the finest strainers. Although screwing it in and out may be difficult, the spin-lock stopper has no wearing components. The twist-and-drop technique is much easier to operate, though it does need O-ring replacement on occasion.
Push-in strainers with a neoprene stopper or a plastic knob that cannot be replaced should be avoided. When exposed to hot water, the plastic pieces crack and lose their sealing capacity.